Below is our finished music video...

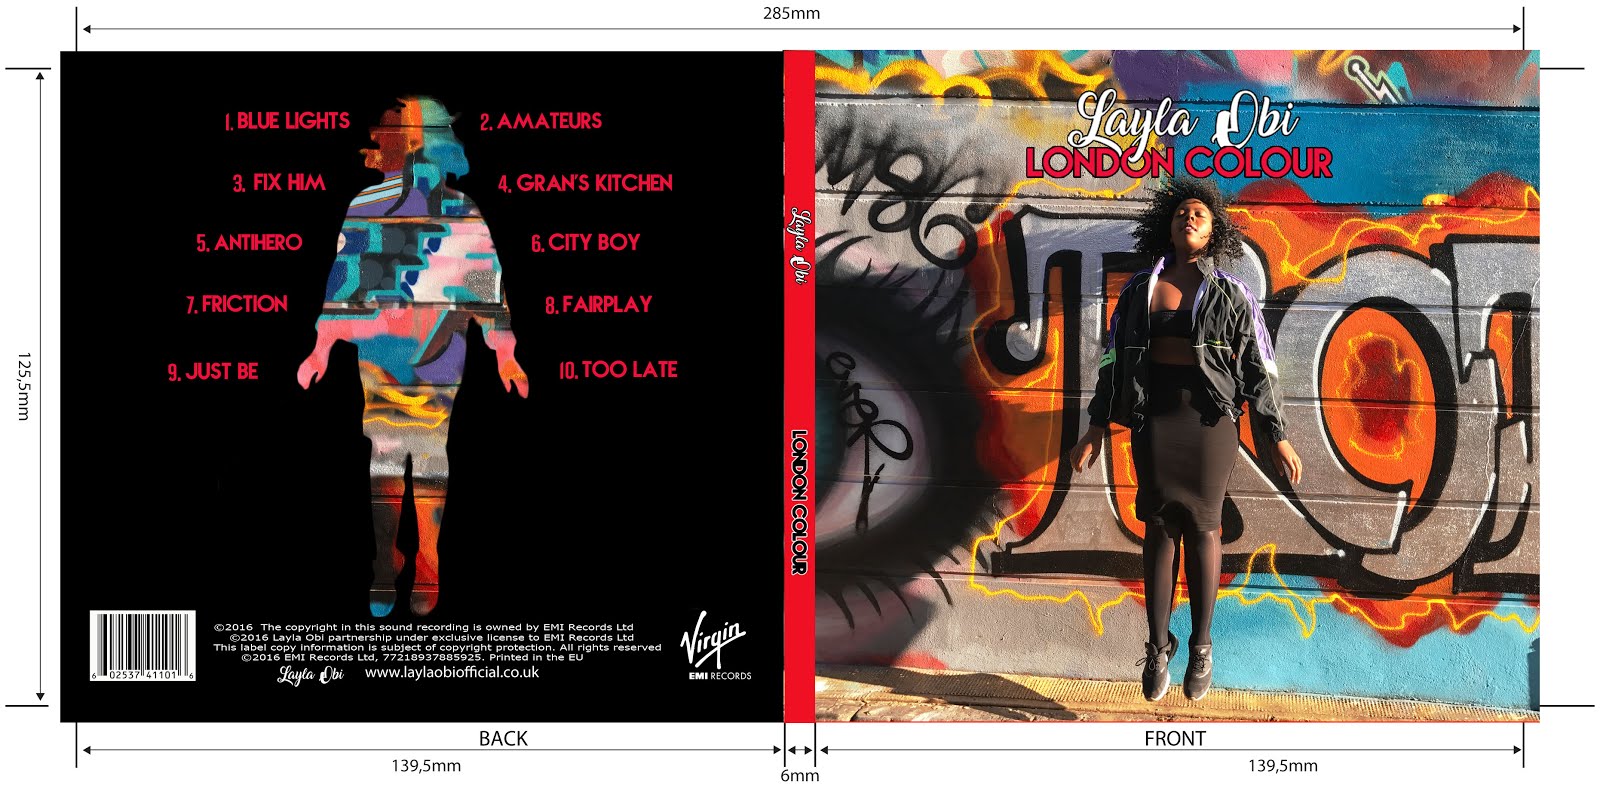
Below are the external panels of our Digipak. Left is the back and right is the cover

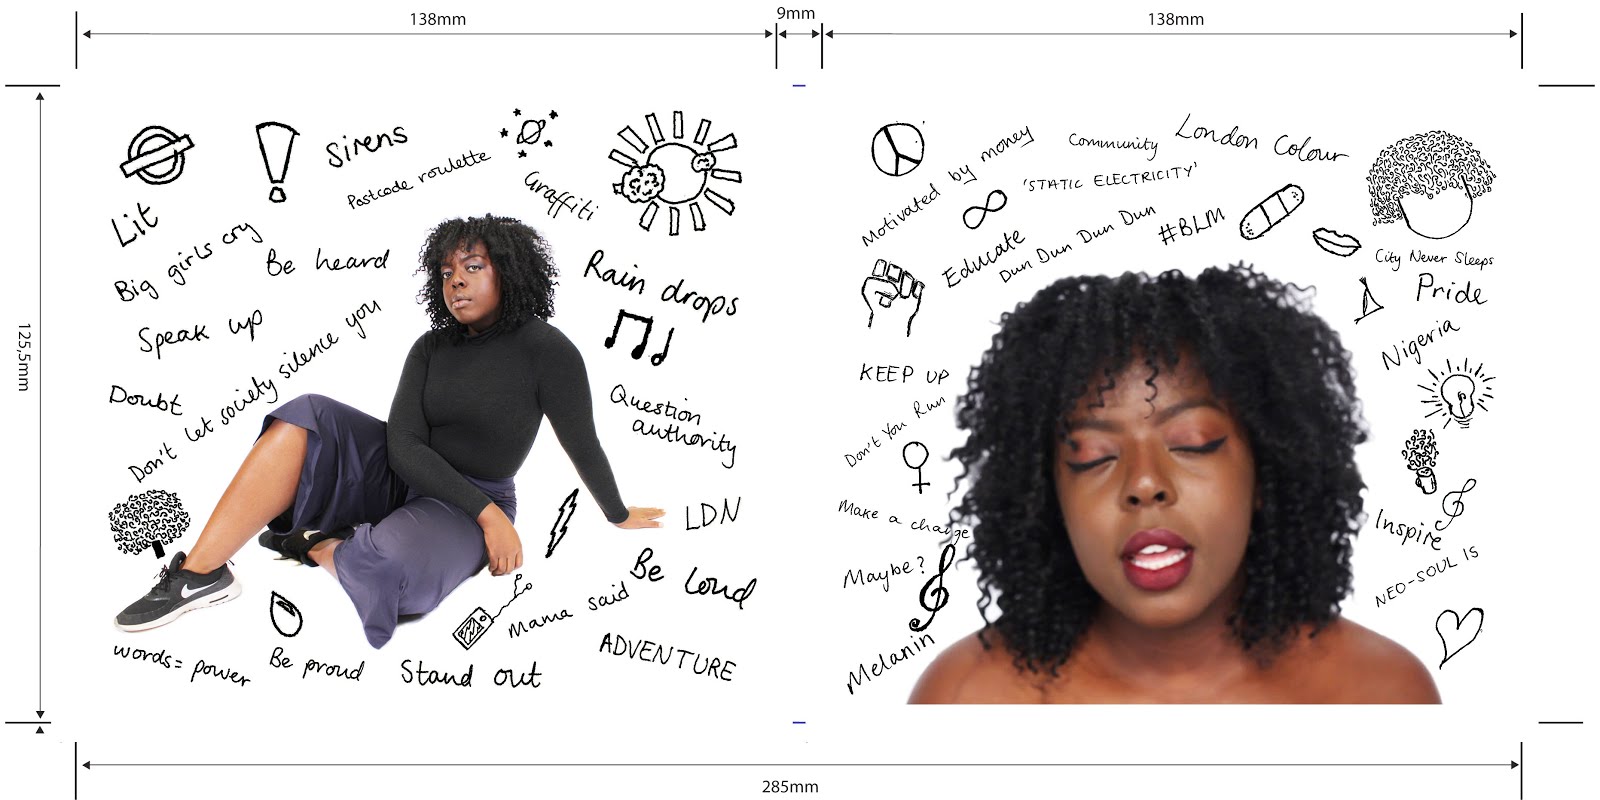
Below are the external panels of my Digipak

Below are the external panels of my Digipak
Left is the back of the album and to the right is the front

Below are the internal panels of our Digipak

Below are the internal panels of our Digipak

Below are the internal panels of our Digipak

Below are the internal panels of our Digipak
Click on the image below to be directed to our website


Sunday 18 October 2015

AS Prelim


My video is called 'Chloe' and is 40 seconds long. In this video a teacher begins to vent to another teacher about her 'day from hell'. She is then seen bitching about one of her students, unaware that she is actually still in the room.  

1) Who did you work with and how did you manage the task between you?
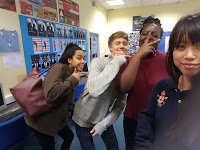
In my group I worked with Ella, Alex and Pheobe (pictured left to right). We managed this task by working together as a group to come up with ideas for the shoot. As a group, we decide the story that we wanted to tell and how we would convey this by carefully planning our shots. However, we also had individual responsibilities within the group. Ella was camera and creative director and was in charge of shaping the storyline of the video. Alex acted in the video and was also in charged of planning the room and organising any furniture/props within it. Pheobe also acted in the video and was in charge of drawing out our storyboard. I contributed by playing the main teacher in the video and was also in charged of writing the script. We were all involved int the editing process, and I was partnered with Ella for this activity. 

2) How did you plan your sequence? What processes did you use? What theories did you try to take into account?
We planned our sequence by creating a storyboard of all the shots that we wanted and then began scripting it. We then drew a top down plan of our shoot room to check that the shots created would work in the space available. We also checked that our shots would work by walking through the shots around the space as a 'practice shoot' with members of the team checking whether the set up of the shots were successful. Once any amendments had been  made, We then casted the characters within our video. After this, we created a props list for our shoot. Considering the time frame we had and the space that was available to us, we then created a shoot schedule so that our day was clearly planned out, preventing delays on the actual day.

Our script
Our top down plan 


Our shoot schedule


Our storyboard 


In our video we took the theories of continuity, framing, genre signifiers and representation into account. We attempted to create continuity through techniques such as not breaking the 180 degree rule, preventing an 'jumps' in the final edit of our video. We also included a master shot which increased continuity as it introduced the two main characters in the same geographical space. By using other techniques such as the shot/reverse/shot and eyeline matches, we are able to show the video from the perspective of one of the characters. This enhances the narrative elements of the video and makes it flow better, therefore improving the continuous elements of it. We also shot and edited the video as a 'real time sequence' so the events were more realistic and looked more continuous. We used a variety of shot types to get different framing types and make the video more interesting visually. We suggested our genre through our choice of characters. We decided to use a very 'over the top' character and a very shy and nerdy character as the main focus of the video. This contrast in characteristics left a lot of room for comedic potential. We were able to represent a lot of people through our choice of casting. By having very ethnically diverse characters we were able to create a large ethnic representation. 

3) What technology did you use to complete the task, and how did you use it?

Technology used on the shoot:
  • Canon HF G30 camera 
  • Tripod
  • Headphones
  • A shotgun microphone
How it was used:
A picture of me shooting 
We kept our camera on auto settings for ease of use in our shorts time available,We attached our camera to the tripod to prevent our shots from being shaky. We ensured that our shots were level by making sure that the spirit level on the tripod was well balanced. We created different shot types by using the zoom functions on the camera. We were able to use the tripod handle to create pans in our video. We also attached our shotgun microphone to the camera. We used this microphone in order to minimise background noise such as wind, whilst also ensuring that it would pick up all the dialogue in the area surrounding it. We also ensured that the quality of our sound was good by plugging headphones into the camera. This meant that we were able to listen to what the microphone was recording and were able to direct people to speak up if the microphone was not picking up their voice. It also meant that any unwanted sound was picked up and resulted in us stopping filming until the sound had stopped. We also used a clapper board at the beginning of each shot so that it would be easier to identify the shots at a later stage. A safety precaution we had to take was ensuring that the wire of the headphones were in sight as they created a trip hazard.

Technology used to edit:

  • Dual monitor editing station
  • Adobe Premiere Pro CS5
How it was used:
A picture of me editing with my partner 
The first decisions that Ella, my partner, and I had to make was which take of the shots taken that we wanted to use. Once we had reviewed them all and picked the once we wanted we then began to edit them. We altered the lengths of our shots by using the in and out functions on the software. We then dragged the cut down clips on to timeline for more close cut editing. As our monitor stations had 2 screens, we were able to look at the shots that we were inputting on the left screen, whilst having a preview of all the edited shots one the right. This was useful as we were able to watch the footage that we had created and find errors which we would then fix on the left monitor.

4) What factors did you have to take into account when planning, shooting and editing?
Planning
We knew that we had a very strict amount of time and space to shoot in. This affected the shots that we chose to include as they have to fit within these limitations. We also had to think about how we would set up the camera around the room without breaking the 180 degree rule which also affected the composition of our shots. We also had to spread out the work load across the team members which was difficult considering we had such a small group.  This small number of people also affected who was available to act within our video.
Shooting
The classroom we filmed in
During the shoot we had to take the constraints of space and time into account again. As we were sharing some of our shooting space with another group, we also had to take their shooting time into account. Objects such as furniture and walls also had to be taken into account as they affected how we set up our camera and therefore affected the overall composition of the shot. As we were filming in a busy building we also had to take factors such as background noise e.g the school bell into account.
 Editing
When editing we had to many different continuity editing techniques into account. Techniques such as shot/reverse/shot affected our choice of shots and the way that they were edited as it requires different shots from different angles to be edited continuously in a sequence. Match on action shots are another feature of continuity that we incorporated. If affected the lengths of our shots as we attempted to get them to match perfectly.

5) How successful was your sequence? Please identify what worked well, and with hindsight, what would you improve/do differently? 
I think that my sequence was very successful as it met the requirements of the brief. An example of something that I think went well is the match on action shot that Ella and I achieved from shot 1 and 2. We were able to successfully match the action of the door being opened in these two shots, thus increasing the continuity of the sequence. I also think that we created a good sense of narrative within this sequence. We were able to do this through using techniques such as shot/reverse/shot and eyeline match to show the conversation from different perspectives. We also successfully stuck to the 180 degree rule and included a master. These are both techniques that helped enhance the continuity of our sequence and make it more successful. However there are some slight continuity errors in our sequence. For example, In the 4th shot my character is holding a book but in the next shot she is not. This goes against the theory of continuity and disrupts the sequence's flow. Another error can be seen between the penultimate and ultimate shot (shot 9 and 10). In shot 9 (Chloe's reaction shot) she turns her head to the left. However, in the final shot she is seen face the right. This also disrupts the continuity in this section of the sequence and results in it not flowing as smoothly. In hindsight I would have used better planning and shooting techniques to avoid these errors. By keeping an eye on the iconography of the shot I could prevent missing props. Doing this in combination of ensuring that the positioning of people within the shots stayed exactly the same as the previous shot would create a more successful sequence.

6) What have you learnt from completing this task? Looking ahead, how will this learning be significant when completing the rest of your foundation coursework, do you think?
The top 3 things I've learnt from doing this project are...

  1. The importance of checking that the shots being used work by walking them through. This helped a lot on the shoot as we knew that the shots the we wanted were possible. It also helped to save time as everyone was aware of how the shots should be set up.
  2. The importance of shooting more takes than required of a shot. This means that there is a wider variety of shots available to pick from when editing. Even the slightest differences between shots can improve the overall continuity of a sequence.
  3. The importance of including the same iconography between continuous shots. By keeping actors and props the same the sequence is able to flow more smoothly.                                        
All of the lessons that I have learnt will help me in my future projects. I will now be able to apply the good points of this project to my future project and use my experiences to prevent the downfalls of this project happening in the future. 
Friday 9 October 2015

Continuity Task 2 (BLK)

I chose to analyse the shooting and editing techniques used to create continuity in the movie 'Pitch Perfect'.

The first shot of this clip is an establishing shot in order to suggest the setting that the two characters are in, however, this first shot also serves as a  master shot. In this shot Jesse (character A) is see shouting out for Beca (character B). This creates continuity through the use of diegetic sound effects that would be expected in the setting of a party and the diegetic sound f character A shouting.

In the next shot we are able to see a cutaway reaction shot from character B. This suggests continuity as the audience would expect the character to react to her name if it was called. In the next shot we are then able to see a match on action sot as character A is shown continuously climbing us stairs towards character B. This creates continuity as it suggests that character A was still moving whilst character B was reacting to his present, therefore creating a more naturalistic shot. In the third shot we are able t see that character A is still climbing, however, he is now higher than before, suggesting that his and character A's movement were both happening simultaneously.

Its apparent that shots 1 and 3 may have been taken in one take and then later had shot 2 edited into it. This was to make it appear as if all the action was happening in the same time  frame. It also made it much easier to achieve the match on action shot as it mean that any unwanted footage could simply be edited out and other shots such as the cutaway shot in shot 2 could be edited in.

In the next shot we are able to see a slight eye line match shot as character B is on a slightly higher level of ground that character A. This makes their dialogue more natural as we are able to see the actions a the same perspective as them. We then see a shot-reverse-shot between the two characters which places the audience in the action, whilst also helping to maintain continuity. In shot 9 we then see another eyeline match shot, however this time it is from a different angle. The shot adheres to the 30° rule in order to prevent 'jumps' between the shots. This also helps to improve the narrative f the scene as we are able to see both characters A and B in this two shot, showing them in the same geographical space as each other.  For the last shot we are then able to see a focus pull so that we are ale to see the reaction of Aubrey (character C). This also promotes continuity as it suggests that the action occurring between characters A and B is happening at the same time and within the same geographical space as character C.


Wednesday 7 October 2015

Evaluation of AOTT Activity (DYM)

Our film shows a mentally disturbed little girl during her time in a mental asylum. Eventually she becomes uncontrollable and begins to murder people that are there. In the opening of my film we are introduced to the main character and are able to see key locations for the movie.  In the opening we see that the girl has already trapped and tallied off one of her victims whilst also preparing for her next victim.

In the film opening we have included vital information such as the main character of the story and the setting of the movie. We also included the names of the main actors within the title sequence. It was also very important that we included the title of our movie for factual purposes.  

The titles link to the film as they reflect the genre of the film. One way that we were able to do this was through our choice of font. By using this font we were able to connote and suggest horror, whilst also sticking to the theme of black on white as we tried to recreate the effect of chalk on walls.  

By the end of my film opening I would expect the audience to be very disturbed by the main character. I would also expect my audience to be very intrigued and invested by my film opening’s story as it is purposefully ambiguous. We achieved this through the use of a variety of CU shots so that the audience is not able to see everything going on in the story at the time, so are forced to make their own assumptions. However, their ideas are not fully fulfilled or dismissed until further within the movie, creating an air of mystery that if able to intensify the suspense and horror of the film.  The fear of the unknown is made very apparent as the audience should question the origin and motive of the little girl.

Three important conventions that are included in my film opening and are vital to the construction of an opening sequence would be:
  • ·        The main characters of the film are introduced. This is very important as the audience has to get a feel for what kind of people the main characters are so that they may predict what they may be like later on in the movie.
  • ·        The genre of the film is suggested. This may be done through the use of genre signifiers. For example, in my film opening the use of blood helps to quickly suggest the genre of horror.
  • ·        The title of the film is included. Although this is mainly for factual purposes, the title also acts as anchorage for the rest of the film opening and may be used for dramatic effect depending on its placement.


I think that my film opening was effective as an opening as I was able to successfully portray the genres of a horror/ thriller through my choice of narrative and shooting style.  I also think it was successful due to the fact that we included the typical conventions of a film opening. This was particularly important as we had to fulfil the audience’s expectations of finding out information about the film, without revealing too much about the narrative of it. However, I do think that our opening was slightly too ambiguous in terms of setting. If I were to do this task again I would ensure that I added a wide establishing shot of all of the setting so that the audience are aware of the geographical space that all of the action within the film is occurring in.    

Friday 2 October 2015

Art Of The Title Research DYM


I chose to compare the opening title sequences for the films Gone Girl and Saturday night fever. Both films contrast greatly in genre, which is reflected in the manner that their title sequences have been made. 

Although both films are very different, their opening titles stick to the conventions that any audience would expect. For example, both films set the setting of the films through a selection of establishing shots. Both title sequences also introduce the main characters and of course, reveal the title of the film. These details are required by the audience so that they may get a feel for what the rest of the film could be like and so that they may begin to understand key information that is vital for the plot. 

As the film 'Gone Girl' is a drama and thriller, it uses a cold and slightly blue colour scheme in order to create a somber atmosphere. However, in the film 'Saturday Night Fever' there is a large amount of colour used within the opening sequence as it is an uplifting musical drama. The use of music also helped to within these sequences to portray the genre of the films. For example, In 'Gone Girl' very eerie music plays throughout the sequence which would be expected in a thriller mystery. In 'Saturday Night Fever', very upbeat music plays to connote the happy and lively nature of the film. 

In 'Gone Girl' we are immediately introduced to one of the main characters. We are able conclude this with the help of the voice over. The voice over is spoken in 1st person so we are then able to understand that we as an audience are seeing things in the perspective of another main character. However, it is not until the last few frames that we are actually able to see this character, highlighting the mysterious nature of the film. This contrasts to the presentation of characters in 'Saturday Night Fever'. In this title sequence we are not introduced the main character immediately as the setting of the movie is established through some establishing shots first. We then follow the main character as he walks through a busy city. Here, we are able to see how he interacts with other people and can make assumptions about his characteristics. 

Film Opening Analysis DYM

I chose to analyse the opening sequence of the film Back To The Future which is a Sci-Fi, comedy. The opening sequence takes place in a garage/ bedroom over the course of a morning. Initially in the sequence the audience is only able to hear and see the ticking of many clocks as the camera does a slow pan across the room. This is in keeping with the theme of time changing, suggested by the title 'Back To The Future'. During the pan we then see a framed article saying that a 'Bankrupt Inventor' called Brown has had to sell his land. This reveals to the audience that the current space they are exploring may belong to 'Brown' as the large amount of clocks may be something that would be associated with an inventor. We then see the very dirty and cluttered room of this person which may suggest their cluttered mindset as they struggle to pull their life back together. We also hear a radio advertisement for a new car which is vital for later on in the movie when they buy a car and turn it into a time machine, although this isn't made apparent to the audience within this opening sequence. A whole array of faulty inventions are then shown in another pan. The TV then switches on so that the report on missing plutonium can be heard. Actions from the faulty inventions such as the toast in the toaster burning and the coffee maker not having a jar to pour the hot water in to reveal that the inventor may be a careless character. This also creates more comedic potential for the rest of the movie. A second character is then introduced when he enters the garage, appearing to use a hidden spare key. At first we are only able to see this character's feet which raises suspicion as the audience are know show his identity. However, we can tell it is a teenage boy by his scruffy trainers and his relatively low voice. The boy then puts his skateboard down which eventually rolls over to a box marked 'Plutonium, handle with care.' By this point the audience are able to release that this plutonium is the same plutonium that was reported missing in the recent news broadcast. This raises an air of mystery about why and what Brown would need plutonium for. This information is deliberately withheld so that this sense of the unknown may continue further into the movie, highlighting the element of surprise. Finally, the teenage boy is seen switching different elements of electricity on, emphasising the chance of danger. The boy then plugs a guitar into what appears to be a very powerful electricity source and is blow across the room on to a coach. This reveals the adventurous nature of the character and foreshadows the It is vital that all these events are linked as all the inventions used to create the moments are intertwined. As the events occur in this order the audience are also able to take in information about the character gradually and are able to make their own assumptions. As with any opening title sequence, the audience would expect to know the title of the film, the genre of the film, the setting of the film and the main characters as these are conventions that they would expect. By knowing these conventions they may be able to conclude aspects of the film which will then be challenged or confirmed later on.

Tuesday 29 September 2015

Continuity Task 1 (BLK)

In my video Characters A and B are in a classroom whilst character C enters the classroom from the hallway. Once character C is in the classroom, he loses his balance and falls flat on his face. After character C composes himself, character A is seen in a shocked state.

We attempted to create a 'narrative flow' by first having a two shot of characters A and B in a classroom as an establishing shot. We then attempted to create a cross cutting shot in shot two when character C is outside of the classroom in the hall way leading up to it. This is so that the audience could tell that the two pieces of action were happening simultaneously and will eventually combine. In shot 3 we then crossed back to inside the classroom with both character A and the classroom door visible. This use of a master shot was to show the geographic space and show the characters interacting in the same place. We attempted to have a match on action shot in shot 3 to increase continuity by having footage of character c walking towards the classroom door so that the cut from the previous shot was not too harsh. In shot 4, when character C eventually falls over, we decided to pan across this room to follow this action as we felt it was more fluid. At the end of shot 4 character C has fallen over and has his books scattered around him. Although we changed the angle and framing of the next shot, we attempted to keep good continuity by trying to keep character C as still as possible so that he appeared in the same position in the next shot. In the final shot we had a reaction shot of character A as we felt that it made the scene more naturalistic as people would expect a reaction if there were other people in the room.


We were unable to achieve full continuity as it is very difficult to achieve this without editing any of the footage taken. Although we attempted to be as precise as possible, delays in starting or stopping the filming of shots resulted in a video that was not perfectly continuous. Despite this, I do think that our video had a good narrative flow as it flowed well enough for the audience to be able to understand the clip. In hindsight, I would change the length that some shots were shot at in order to improve the narrative flow and tell the story more effectively. For example, I would cut down the first shot by a large amount (roughly 6 seconds) as it is only an establishing shot and is able to meet its purpose of setting the scene in very little time. In shot 2 I would start character C off frame so that when he begins walking there is no long pause. This would help the scene seem more naturalistic. In the 3rd shot I would cut some of the footage at the beginning so that character C starts the scene already close to the classroom door in order to achieve a much more precise match on action shot. Character A would also react to character c entering the room by looking up at him in order to increase the naturalistic aspects of the scene. I would also reconsider the framing of shot 4 as although the Low Angle shot provides diversity in shot types; it makes a very apparent jump in the positioning of the camera which hinders the narrative flow. In shot 4 I would also include a trip hazard for character C to fall over so that his accident looked more realistic. Although we tried to prevent this, there is an apparent jump cut between shots 4 and 5 as character c appears to move positions slightly after he falls. If I could do this task again I would ensure that the actor stayed perfectly still in order to prevent this jump cut. Another change that I would make would be to swap around shots 5 and 6 in order to prevent the delay in reaction from character A. This would make for a more believable scenario and would increase the narrative flow of the video. 

Friday 18 September 2015

My Film Still Analysis (BLK)

The iconography of my chosen shot could be described as signifying my chosen genre of Horror/Thriller as the vague nature of the shot forces the audience to question where the hand is coming from and why it is there. This air of mystery helps to suggest my genre as the audience experience the 'fear of the unknown'.  The fact that only the hand of the being can be seen in this shot also encourages this as it makes it less personal as so little details are known about whoever's hand it is. Lacking information is typical within genres such as thrillers as it helps to increase the surprise felt by the audience later on in the story. The curled fingers also help to suggest my genre as they distort the shape of the hand, making it appear abnormal and therefore scarier. The format of my shot also creates a disturbing feel as the angled positioning is unsettling as the lines  within the background are not parallel, foreshadowing the unnatural and un-composed  nature of the film.

 Within our shot we only included a hand to arouse suspicion and make the audience question the motive of the hand. To achieve this effect we ensured that the iconography of the shot had high key lighting so that a shadow would form around it. This would further connote our genre as it intensifies the sense of darkness within the shot. 

Through this shot I was attempting to communicate a sense of mystery and fear because of the unknown origin of the hand. I wanted the audience to question things such as ‘who’s hand is it?’, ‘where has it come from?’and ‘where is it going?’. These questions will then wok to emphasise the thrill of the film as the details are revealed later on in the movie.

 I think that the lighting of my shot was successful as we were able to achieve a very effective shadow of the hand. I also think that the angle at which our shot was framed was successful as we were able to make an irregular composition of the shot through the use of different perspectives. The LA shot also helps to create the illusion that something is coming toward you. 

In hindsight, we would insure that we used a model that did not have nail varnish on as the bright colours are not fitting with our very dark genre. These bright colours could alter the dominant reading of the shot by our audience as the bright colours could possibly connote happiness or femininity rather than fear.